Note: Loosen the turnbuckle on the HLL to allow for more space on continuing the following steps.
Loosen and separate the Hollow Bolt located on the opposite end of the Turnbuckle on the HLL.
Pull Hollow-Bolt 1ft. Away from Cable Grab. Loosen the Back-Cylinder on the cable grab and pull out the Spring located in the inside cylinder of the Cable Grab.
Pull both the Back-Cylinder and spring 2 ft. Past the Turnbuckle.
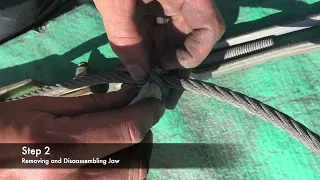
2) Removing and Disassembling Jaw
Gently, pull the entire Jaw out from the Inside-Cylinder of the Cable Grab and remove the Jaw 1ft. Past the turnbuckle.
Secure the Jaw with both your thumb and index finger on the O-Ring.
Gently and individually raise each jaw-piece away from the O-Ring so the band can unhook from the lower Jaw-molding.
Place each jaw piece on a flat surface adjacent from the HLL with the Jaw threading facing up.
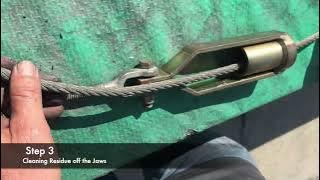
3) Cleaning the Residue off the Jaws
Take Brake Cleaner and spray Brake Cleaner to each jaw piece until the thin residue is off of each piece.
Dry each jaw piece before proceeding.
Next, individually take each Jaw Piece laying the piece vertically on a flat surface, you will horizontally scrub each jaw piece until the residue is gone. Avoid scrubbing the threads of each jaw directly with Wire Brush.
Place Jaw Pieces back onto a flat surface.
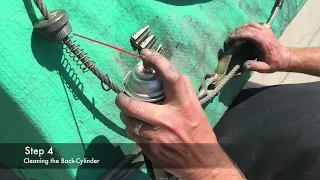
4) Cleaning the Back-Cylinder
Take Brake Cleaner and spray Brake Cleaner to each jaw piece until the thin residue is off of each piece.
Dry each jaw piece before proceeding.
Next, individually take each Jaw Piece laying the piece vertically on a flat surface, you will horizontally scrub each jaw piece until the residue is gone. Avoid scrubbing the threads of each jaw directly with Wire Brush.
Place Jaw Pieces back onto a flat surface.
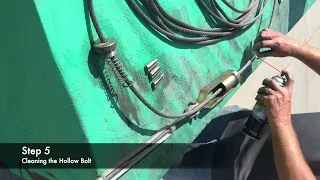
5) Cleaning the Hollow-Bolt
Apply Brake-Cleaner to the threading of the Hollow-Bolt until the residue is gone.
Let Hollow-Bolt dry.
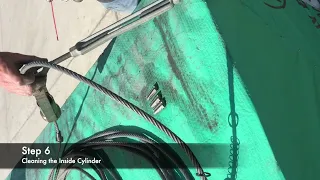
6) Cleaning the Inside-Cylinder
Pick up Bolts connecting the turnbuckle and the cable grab, allowing the cable grab to hang at 45 degrees towards the cleaning surface.
Spray Brake Cleaner in the Inside Cylinder allowing for the residue to flush out of the Hollow-Bolt port.
Spray Brake Cleaner in the Inside Cylinder’s Threading allowing the residue to flush out the Hollow-Bolt Port.
7) Scrubbing and Cleaning Inside-Cylinder
Take Wire Brush and thoroughly clean the Inside-Cylinder until the residue is gone.
Reapply Brake Cleaner to Inside Cylinder threading allowing for any remaining residue to be flushed out.
Take Wire Brush and clean the thread in the inside-cylinder for any remaining residue.
8) Cleaning the Back-Cylinder Cap
Take Wire Brush and scrub the threading on the Back-Cylinder Cap located next to the spring.
Scrub the Inside of the Back-Cylinder Cap.
Reapply Brake Cleaner on the thread of the Back-Cylinder and apply Brake Cleaner inside of the Back Cylinder.
Take Wire Brush and Scrub the threading on the Back-Cylinder Cap.
Click here for Instructional Videos for Changing the O-Ring in the Cable Grab
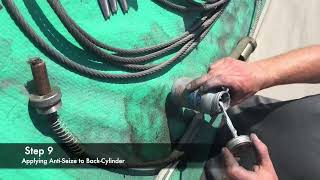
9) Applying Anti-Seize to the Back-Cylinder Threads (About the Size of a Pea)
Take Anti-Seize and apply (Pea-Size) amount of the lubricant to the threading on the Back-Cylinder Cap.
Note: Threads should be well-defined and visible.
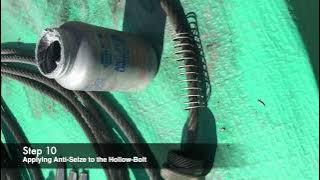
10) Applying Anti-Seize to the Hollow-Bolt
Apply Anti-Seize ¼ inch. up from the bottom threading of the Hollow-Bolt.
Only apply Anti-Seize on one-side of the lower portion of the Hollow Bolt.
Note: The Anti-Seize will spread throughout the bolt once tighten back into the cable-grab
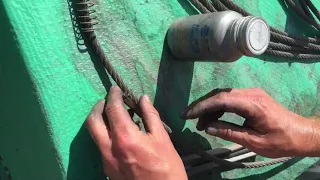
11) Jaw-Reassembly
Locate the O-Ring on the cable and individually take each jaw piece one at a time and slide the skinny end of the jaw piece facing towards the cable grab and slide the jaw piece through the O-Ring until the O-Ring locks onto the jaw-mold.
Repeat this step 2 more times.
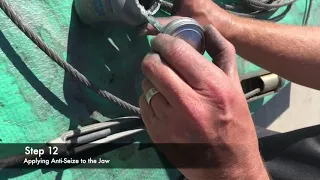
12) Applying Anti-Seize to the Jaw
Apply a paper-thin amount of Anti-Seize on the outer shell of the Jaw and apply Anti-Seize to the O-Ring.
Caution: Do NOT apply Anti-Seize in the crevices of the Jaw nor the threading inside of the Jaw. Not following this step correctly can ruin the HLL’s integrity.
13) Placing Jaw/Spring Back into the Inside- Cylinder of the Cable Grab
Make sure the Inside Cylinder is dry from the Brake Cleaner.
Slide the jaw towards the inside cylinder and secure the jaw back into the Inside-Cylinder.
Slide the Spring to the appropriate position located in the Inside-Cylinder after the jaw is adequately placed.
Move the Back-Cylinder cap towards the cable grab.
Reinsert Back-Cylinder cap.
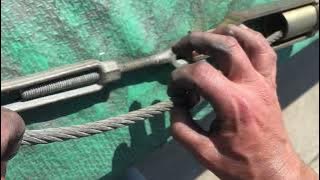
14) Reattaching the Hollow-Bolt
Slide the hollow bolt to the screw port on the cable grab.
Tighten the Hollow-Bolt 1/2 inch back into the screw port.
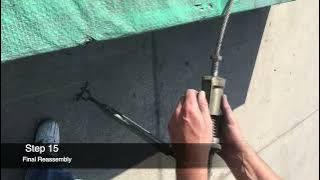
15) Final Reassembly
Click to Email Safety Pole
Contact Safety Pole The Safety Pole System Meets Your Fall Protection Framing Needs